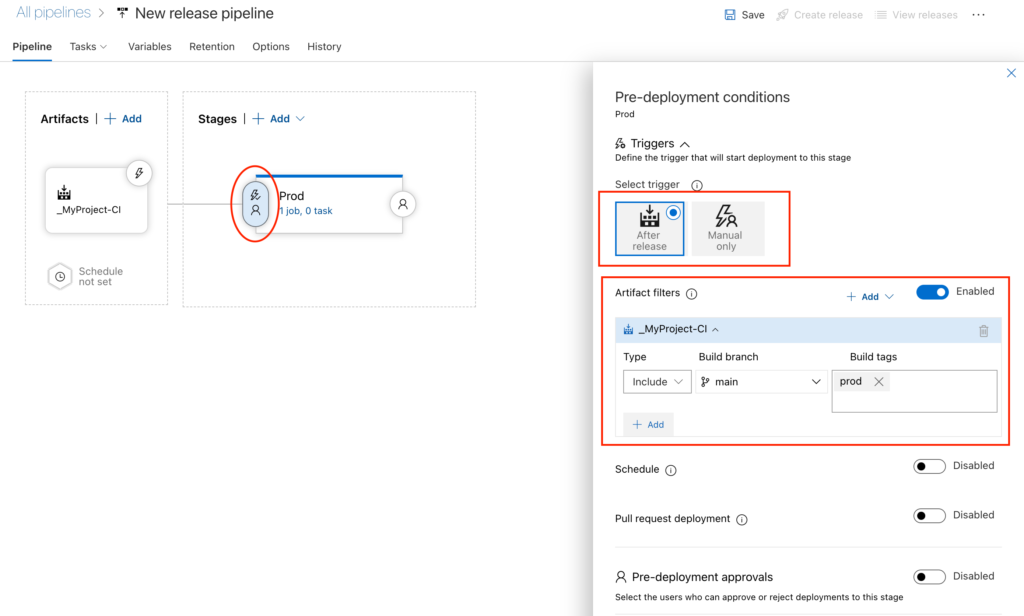
Adding a tag to your build in Azure DevOps is very useful – you can use it later on with releases to accept only builds with certain tags. That comes in handy when you are building a project with many different configurations which you will, later on, deploy via different releases. For example:
BUILD (tag: client1) -> RELEASE CLIENT 1
BUILD (tag: client2) -> RELEASE CLIENT 2
You can use it on client basis or environment basis like dev, uat, prod.
You can add as tag whatever you want. For example variable value that you can set, when you are starting the build. You can skip next step if you want to use existing variable in your pipeline.
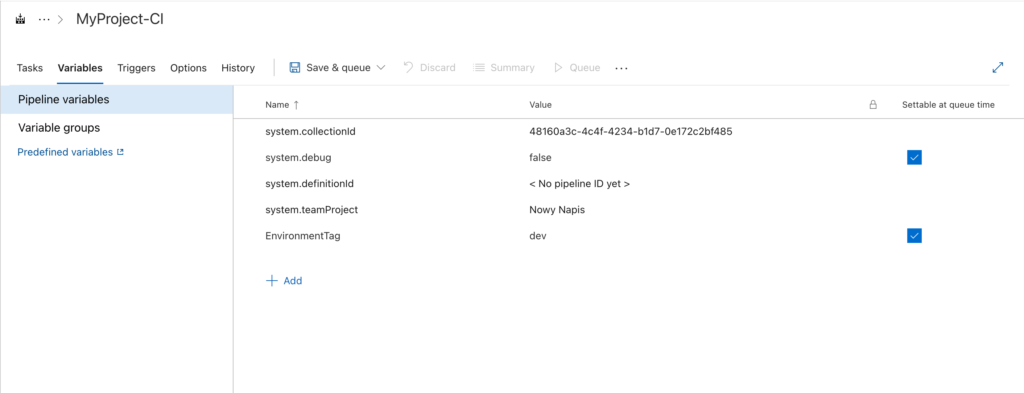
Create variable in your build pipeline
- Create or edit your existing pipeline.
- Go to
Variables/Pipeline variablestab. - Add your variable, for example
EnvironmentTagand add default value. - Select
Settable at queue timeto make sure that you can change it when you are scheduling your build.
Add a stage to tag your build
- Go to the
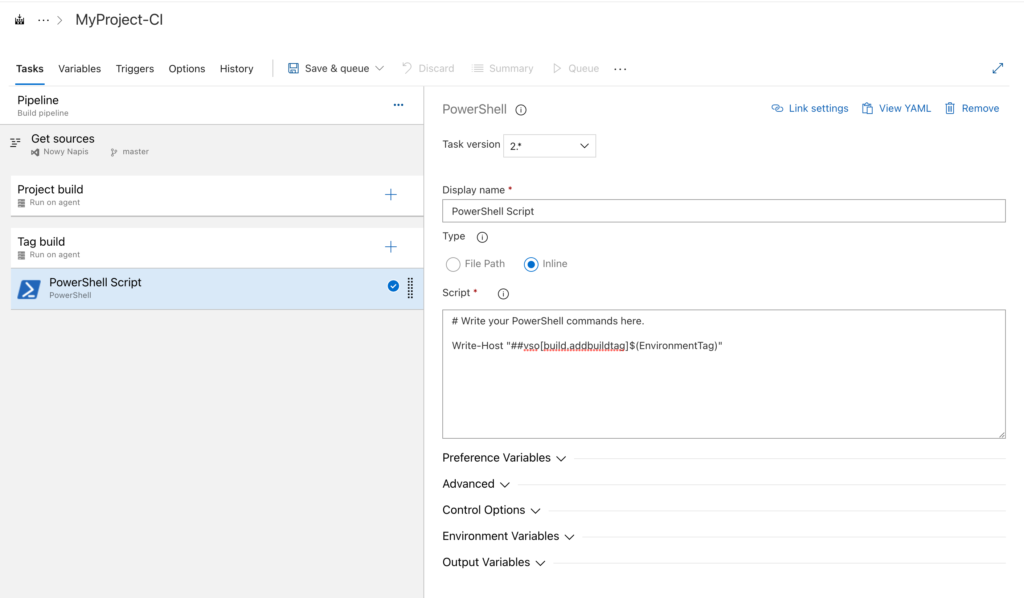
Taskstab. - It’s good to have 2 stages – one to perform all the tasks related to your build and the other to tag the build.
- Add
PowerShellorBashtask that will add tag based onEnvironmentTagvariable value:Write-Host "##vso[build.addbuildtag]$(EnvironmentTag)"
Execute pipeline
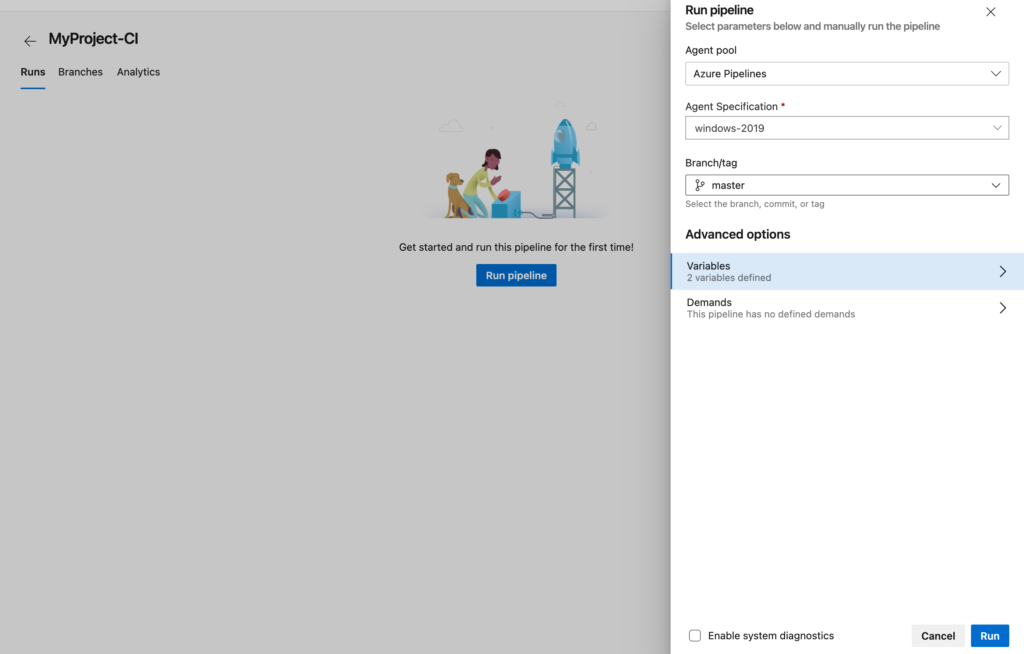
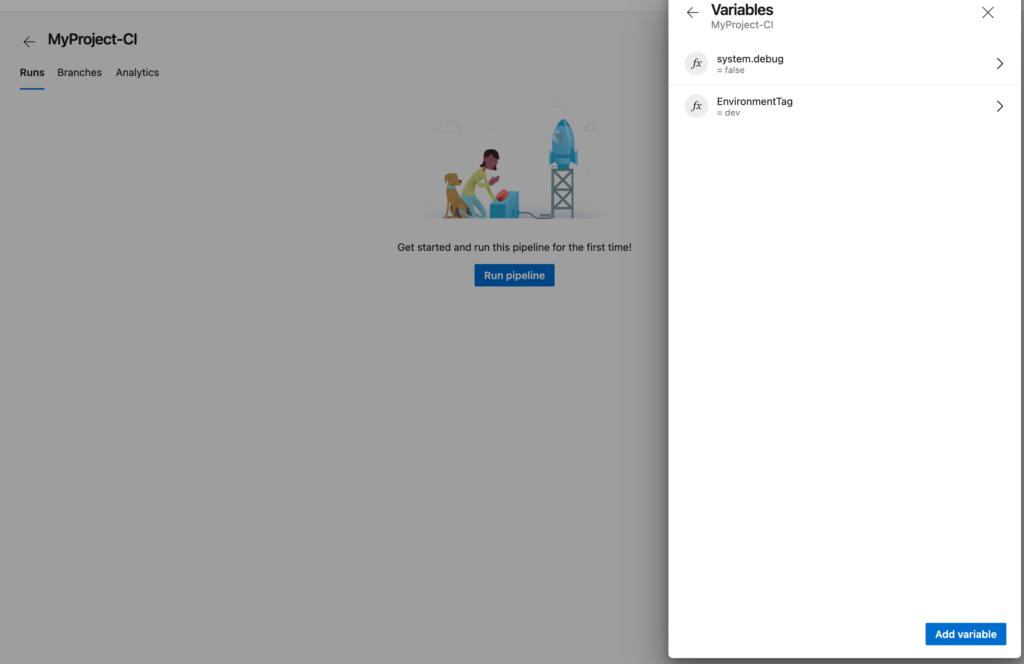
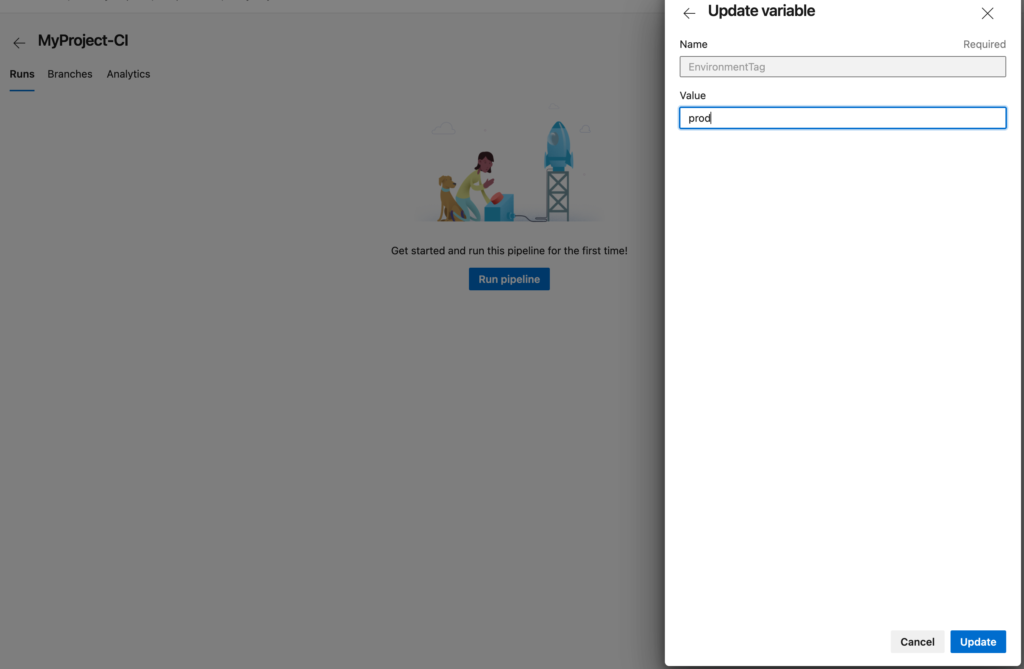
When you go to the build pipeline summary and go to Run pipeline you should be able to go to Variables and change EnvironmentTag value.
Check your tag
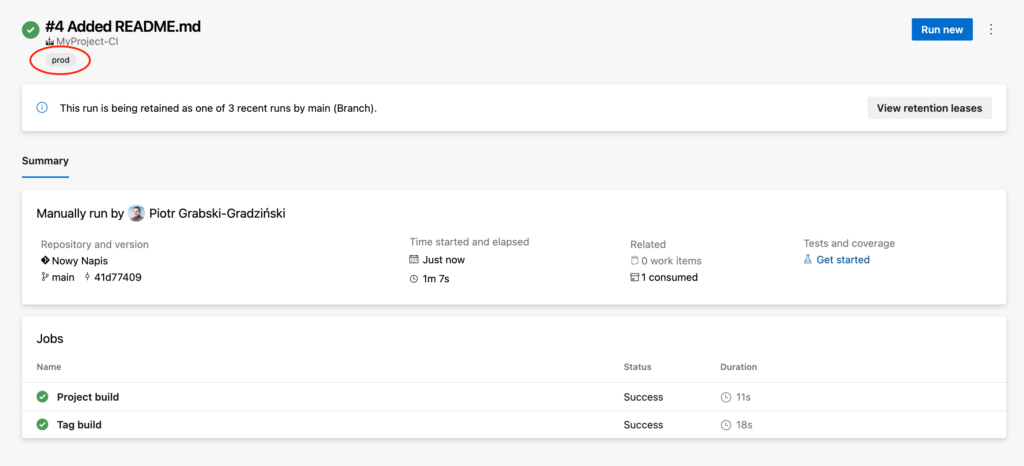
Once your build is completed you can go to your build and check if you have your tag in there.
Use tags in release pipelines
Once we have our build tagged, we can use that information on the release pipeline level, and for example trigger, automatic trigger based on branch and tag. Go to your release pipeline and edit the Pre-deployment conditions for your stage. In this example, I want to do an automatic release of Prod stage once the build from branch main and with tag prod is created.
